Getting Started with Shopify

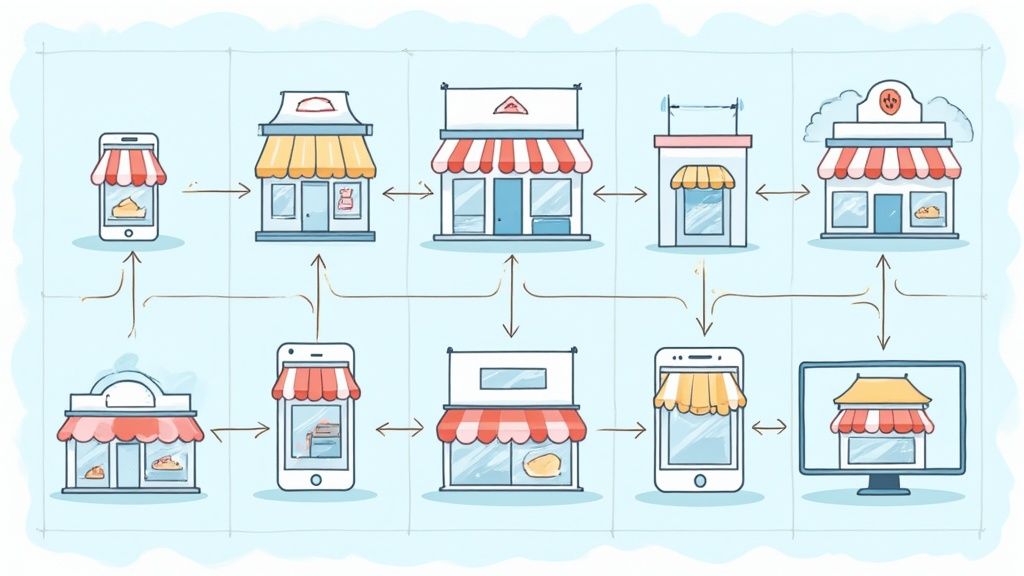
So, you’re ready to create a Shopify website. That's a fantastic decision! Shopify provides a powerful platform for businesses of all sizes to build and expand their online presence. It's like having a fully equipped retail space online, just waiting for your personal touch and products. This section will walk you through the initial setup of your Shopify store, creating a solid foundation for online success.
First, you'll need to create a Shopify account. This is a simple process that involves selecting a plan based on your budget and needs. Similar to choosing the right physical retail space, consider factors such as the number of products you intend to sell and the features you require. This approach helps you avoid unnecessary costs initially while allowing room for expansion as your business thrives. After selecting a plan, you'll provide basic information about your store, like its name and address. This information forms the basis of your online identity and shapes how customers perceive your brand. From here, the exciting part begins: designing your Shopify site.
Once your account is set up, you can start designing your Shopify site. This is where you can showcase your brand’s personality and craft a distinctive online shopping experience. Your first task is choosing a theme. Shopify offers a wide array of free and paid themes, which determine the overall appearance of your store. Choosing a theme is like selecting the architectural design of your store—it sets the overall aesthetic and influences the customer journey. Following this, you'll customize the chosen theme to match your brand’s visual style. This includes selecting colors, fonts, and imagery that appeal to your target audience. Think of this stage as decorating your physical store—choosing the right paint colors, furniture, and lighting to create an appealing environment. This careful selection is the next step toward building a successful online store.
Now, it's time to add your products to your Shopify site. This involves entering important details for each product, such as its name, description, price, and images. Providing accurate and enticing product information is crucial for turning potential customers into buyers. Imagine walking into a store with no price tags or product descriptions – it makes purchasing difficult. Similarly, clear and informative product pages on your Shopify site are vital for a smooth shopping experience. Furthermore, organizing your products into collections helps customers easily navigate your store. This is similar to categorizing products in a physical store, making it simple for customers to find what they need. This organization is a vital step in designing a Shopify site and is fundamental to customer satisfaction. With your products organized, the next step is choosing the right theme for your site.
Choosing Your Theme

After setting up your Shopify account, selecting the right theme is the next crucial step in designing your online store. Your theme serves as the visual foundation, influencing the layout, colors, fonts, and overall aesthetic. It ultimately affects how customers perceive your brand and navigate your products. Choosing a theme is like selecting the perfect outfit – it should reflect your style and make a positive impression. With a vast array of options, finding the right fit can be daunting. This section will guide you through this process, helping you choose a theme that sets the stage for a successful online business.
Free vs. Paid Themes: Weighing Your Options
Shopify offers both free and paid themes. Free themes provide a budget-friendly entry point, whereas paid themes typically offer advanced features and more customization choices. This is comparable to choosing between a ready-to-wear outfit and a bespoke creation. The ready-to-wear option (free theme) is practical if budget is a constraint, while the bespoke option (paid theme) offers a more personalized and polished look. Consider your budget and long-term objectives when making this decision. A free theme might suffice for a small startup, but a growing business might require the added functionalities and adaptability of a paid theme when designing their Shopify site. The right theme can streamline the design process and lead to a more effective online store.
Industry-Specific Themes: Catering to Your Niche
When designing a Shopify site, selecting an industry-specific theme offers distinct advantages. These themes are designed with the particular requirements of different industries in mind. For example, a fashion theme might incorporate features like lookbooks and size charts, while a food-related theme could include integrated recipe sections. Choosing a relevant theme is like selecting the right tools for a particular job – it makes the entire process smoother and more efficient. This tailored approach improves user experience and can boost conversions. As a result, focusing on the right theme is an important consideration.
Key Features to Consider
Beyond aesthetics, certain crucial features should inform your theme selection. Mobile responsiveness is paramount, guaranteeing your website displays and performs seamlessly across all devices. Think of it as designing a store that adapts to customers of all shapes and sizes – everyone should have a comfortable and enjoyable browsing experience. Moreover, prioritize themes that provide customizable layouts, allowing you to present your products in the most effective way. This is similar to adjustable shelving in a physical store, enabling you to optimize product displays for maximum impact. Finally, consider features like integrated SEO tools and social media integration to amplify your online presence and reach. These factors contribute to a well-rounded and effective online store, crucial for succeeding in the competitive e-commerce world. This attention to detail is paramount when designing a Shopify site and sets you up for success. With a theme selected, the next step is personalization.
Customization: Making it Your Own
Choosing a theme is just the beginning. The true transformation happens when you customize it to reflect your brand’s distinct identity. This includes modifying colors, fonts, images, and other visual elements to align with your brand guidelines. Visualize painting the walls of your store, adding personalized signage, and arranging displays to create a unique ambiance. Similarly, customizing your Shopify theme allows you to craft a recognizable online presence that connects with your target audience. This is how you set yourself apart and create a memorable shopping experience. Remember, a thoughtfully designed and customized Shopify site can have a significant impact on customer engagement and ultimately, drive sales. This personalization is essential when designing a Shopify site, making it truly your own. Now, let's focus on setting up your products.
Product Setup Guide
After carefully selecting and customizing your theme, the next critical phase in designing your Shopify site involves adding your products. This is where your virtual shelves come to life, showcasing the heart of your online store. This process goes beyond simply listing items; it’s about presenting your offerings strategically to engage customers and encourage purchases. This section will guide you through adding and organizing your products, transforming your Shopify site from an empty space into a bustling online marketplace.
Adding Products: The Building Blocks of Your Store
Adding products to your Shopify site is the foundation of your online presence. Each product page acts as a digital storefront, providing customers with all the details they need to make informed decisions. Begin by navigating to the "Products" section within your Shopify admin panel. This is your central hub for managing your inventory. From there, click "Add product" to start creating individual product listings. Much like stocking the shelves of a physical store, you’ll need to enter essential information for each item.
For example, if you sell handmade candles, you would input the candle's name, such as "Soothing Lavender Candle", along with a rich description highlighting its fragrance and benefits. Just as a customer would inspect a candle in person, your online description should provide the same level of detail, appealing to their senses and enticing them to buy. This detailed approach is fundamental when designing a Shopify site. Next, you'll want to focus on the visuals.
Utilizing High-Quality Images: Showcasing Your Products
In the e-commerce world, visuals are king. High-quality product images are the digital equivalent of attractive window displays, drawing in customers and presenting your offerings in their best light. When designing a Shopify site, compelling images are key to captivating customers and driving sales.
Incorporate multiple images from various angles, allowing customers to virtually examine your product. Continuing with our candle example, you could include close-ups of the wax, the wick, and the overall design, offering a comprehensive visual experience. Just as a customer would pick up and examine an item in a physical store, multiple images provide a similar experience online. This level of detail enhances customer trust and encourages purchases. This attention to detail leads us to organizing your products.
Organizing Products with Collections: Creating a Seamless Shopping Experience
As your product catalog expands, organizing items into collections becomes crucial for user-friendliness. Collections act like departments in a brick-and-mortar store, grouping similar products for efficient browsing. This is a crucial element when designing a Shopify site, ensuring customers can easily find what they are looking for.
For example, if you offer various candle types, you might create collections like "Floral Scents," "Relaxation Aromas," and "Seasonal Candles." This enables customers to quickly locate products matching their interests. Just as a shopper would browse the "Home Fragrance" section in a department store, collections offer the same targeted experience online. This streamlined navigation significantly improves customer satisfaction and boosts sales potential.
Moreover, consider creating automated collections based on specific criteria, such as product type, price range, or tags. This dynamic approach, similar to a smart inventory system that automatically restocks based on real-time demand, keeps collections current and relevant, saving you time and effort. By thoughtfully organizing your products, you create a seamless and enjoyable shopping experience that encourages exploration and purchases. This structured approach is essential when designing a Shopify site. This creates a visually appealing and easily navigable online store. This streamlined experience fosters customer loyalty and contributes to overall success. With products set up, the next step is managing payments and shipping.
Shopify Apps for User Experience, Personalization & Revenue Increase
Once your products are ready, enhancing user experience and personalization becomes the next priority in designing your Shopify site. These factors are key to guiding customers smoothly through their journey from browsing to purchasing, making each interaction meaningful and engaging. This section will assist you in implementing these elements effectively, ensuring a customer-centric approach that boosts satisfaction and loyalty.
User Experience: Crafting a Smooth Journey
Creating a seamless user experience is akin to having a well-organized store where customers can effortlessly find what they need. On a Shopify site, this involves intuitive navigation, quick load times, and clear calls to action that encourage conversion.
Utilize apps such as PageFly for designing custom pages that enhance the shopping experience. Offering a variety of page layouts can help you tailor the site to meet different customer expectations, thus improving engagement and conversion rates.
Personalization: Tailoring the Shopping Experience
Personalization is about offering customers a shopping experience that feels unique and relevant to them. This can be achieved through personalized product recommendations and marketing messages that resonate with individual preferences.
Incorporate apps like Personalized Recommendations to display products based on customer browsing behavior and purchase history. By showing items that align with their interests, you can improve the likelihood of purchase and build deeper connections with your audience.
Up-sells and Cross-sells: Maximizing Sales Opportunities
Introducing up-sells and cross-sells is an effective way to increase the average order value and ensure customers find complementary products they might need. This strategy not only boosts sales but also enhances the shopping experience by providing added value to the customer.
Consider using apps like Bold Upsell to suggest upgrades or additional products during the checkout process. Highlighting items that complement the customer's purchase can lead to increased satisfaction and loyalty.
Shopify Apps: Enhancing Functionality
To further enhance your Shopify site, explore the wide range of apps available. These tools can help you implement various features and improve different aspects of the shopping experience.
For instance, Klaviyo can be used for personalized email marketing, while Gorgias offers customer service solutions to address inquiries promptly. By integrating such apps, you can provide a comprehensive and engaging shopping experience that meets diverse customer needs.
By focusing on user experience, personalization, and strategic selling techniques, you can create a Shopify site that is not only functional but also engaging and responsive to customer needs. With these elements in place, your e-commerce business is poised for success. Now, let’s explore how to optimize for mobile.
Mobile Optimization
A beautiful website design is only half the equation when creating a Shopify store. With the prevalence of mobile commerce, optimizing your online store for seamless functionality on smartphones and tablets is crucial. This is akin to ensuring your physical store caters to customers of all sizes – everyone should have a comfortable shopping experience regardless of how they access your store. This section explores the vital aspects of mobile optimization for your Shopify site, highlighting how to create a positive experience for your mobile customers.
Responsive Themes: The Foundation of Mobile Optimization
When designing your Shopify site, choosing a responsive theme is the cornerstone of mobile optimization. Responsive themes automatically adjust their layout and content to fit various screen sizes. Imagine a chameleon adapting its camouflage to its environment – a responsive theme similarly adapts to the device displaying it, providing a consistent and user-friendly experience. Most modern Shopify themes are built with responsiveness in mind, but it’s always wise to confirm before making your choice. This guarantees a consistent brand experience from desktop to mobile. Next, consider page load speed.
Page Speed: Keeping Mobile Users Engaged
Mobile users, often browsing on the go, expect fast loading times. A slow website can lead to frustration and abandoned purchases. Just as a long queue in a physical store might cause a customer to leave empty-handed, a slow-loading mobile site can have the same effect. Optimize your Shopify site's page speed by compressing images, minimizing unnecessary code, and using browser caching. This improved performance enhances the user experience and encourages browsing. This is especially critical when designing a Shopify site, as mobile users are particularly sensitive to slow loading speeds. Following this, we'll focus on navigation.
Streamlined Navigation: Guiding Mobile Users with Ease
Navigating a website on a smaller screen requires a streamlined approach. Consider it like clear signage in a physical store, guiding customers effortlessly between departments. Use a straightforward menu structure, avoiding complex dropdowns or nested menus. A “hamburger” menu, a common mobile design element that collapses the menu into a compact icon, is a great option for saving screen real estate. This simplified navigation makes it easier for users to find what they need without feeling overwhelmed, a crucial aspect when designing a Shopify site for mobile users. Next, let’s look at optimizing your product pages for mobile.
Mobile-Friendly Product Pages: Enhancing the Shopping Experience
Product pages are where sales happen. Optimize your product pages for mobile by ensuring images are appropriately sized and load quickly. Use large, clear images that effectively showcase your offerings on smaller screens. Think of this as well-lit displays in a physical store, highlighting the best aspects of your products. Additionally, keep product descriptions concise and easy to read on mobile devices. Avoid dense paragraphs, using bullet points instead to highlight key features. This allows mobile users to quickly grasp the essential information and proceed with their purchase. These adjustments are vital when designing a Shopify site because they directly influence the customer journey.
By prioritizing these mobile optimization techniques, you can cultivate a positive and engaging experience for mobile customers, leading to higher conversion rates and a thriving online business. Remember, mobile optimization is not just a trend but a necessity in today’s mobile-first world. With mobile optimization complete, we can move on to SEO.
CRO Best Practices
Creating a visually appealing Shopify site is a great start, but it alone won't convert visitors into customers. This is where Conversion Rate Optimization (CRO) plays a crucial role. Think of CRO as the tool that transforms site visitors into buyers by continuously refining your website based on how users interact with it. Without CRO, you might miss opportunities to enhance user experiences and boost conversions. This section covers essential CRO practices for Shopify sites, focusing on how to attract and convert users effectively.
Understanding Customer Behavior: The Basis for Design Hypotheses
Before you begin designing or optimizing your Shopify site, it's essential to understand your target audience's behavior and preferences. This involves gathering data on how customers interact with your site and identifying areas for improvement. For example, if you notice that visitors often abandon their shopping carts, you might hypothesize that a more streamlined checkout process could increase conversions. These insights form the basis of your design hypotheses, guiding your testing and optimization efforts.
Continuous Testing: Refining Your Site’s Design
Once you have established your design hypotheses, the next step is to test them through continuous experimentation. This involves making small changes to your site's design and measuring their impact on user behavior. For instance, altering the call-to-action button from "Buy Now" to "Add to Cart" might increase engagement. By conducting these tests, you can identify which design elements resonate best with your audience, leading to higher conversion rates.
This approach also applies to product descriptions and images. Experiment with different layouts, colors, and messaging to determine what attracts and retains customer attention. For example, if you find that customers respond positively to images of products being used, prioritize these visuals in your product galleries. This targeted testing ensures your Shopify site effectively communicates value to potential customers.
A/B Testing: Validating Your Design Changes
A/B testing, which involves comparing two versions of a webpage to see which performs better, is a fundamental aspect of CRO. By running A/B tests, you can validate your design changes and confirm their effectiveness. For example, you might test two versions of a homepage banner to see which leads to more clicks. This method allows you to make data-driven decisions, ensuring that every change contributes to your conversion goals.
Additionally, A/B testing can be applied to various elements on your site, such as headlines, layouts, and navigation. This helps you identify the most effective combinations, providing insights into customer preferences and improving their overall experience. Each test is an opportunity to learn more about your audience and optimize your site accordingly.
Building a Conversion-Focused Site: From Hypothesis to Implementation
As you gather insights from continuous testing and A/B experiments, implement the successful changes to build a more conversion-focused Shopify site. Consider these changes as enhancements that improve user experience and drive higher sales. For instance, if a specific product page layout increases conversions, replicate this layout across similar product categories. By consistently applying proven strategies, you strengthen your site's ability to convert visitors into loyal customers.
By incorporating these CRO best practices, you can ensure that your Shopify site not only attracts visitors but also effectively converts them into customers. This approach increases traffic, enhances brand recognition, and ultimately boosts sales. Remember, CRO is an ongoing process that requires regular analysis and adjustments to maintain a competitive edge and achieve sustained success. With your site optimized for conversions, you're ready for launch.
Launch Checklist
You've designed your Shopify site, carefully crafted product pages, optimized for mobile, and implemented SEO best practices. Now comes the final preparation before launching your store to the world. This checklist covers the crucial steps for a smooth and successful launch, transforming your vision into a thriving online business. This is the last critical stage when designing a Shopify site, ensuring everything is ready before you open your virtual doors.
Final Checks and Balances
Test Your Checkout Process: Like a final walk-through before opening a physical store, thoroughly test your online checkout. Make a purchase yourself, using different payment and shipping options, to catch any errors and improve the customer experience.
Review Your Content: Proofread all website content, from product descriptions to blog posts, eliminating typos and errors. This final polish reflects professionalism and builds customer trust, similar to ensuring all price tags in your store are accurate and clear.
Optimize for Mobile: Double-check that your site displays and functions perfectly on various mobile devices. This is essential as a significant portion of your customer base will likely browse from their phones or tablets, especially in today's mobile-centric world.
Set Up Analytics: Integrate tools like Google Analytics to track store performance. This data provides valuable insights into customer behavior, allowing you to make informed decisions and continuously refine your strategy. This is akin to having a sophisticated security system tracking customer flow and identifying popular areas in a physical store.
Pre-Launch Marketing Buzz
Build an Email List: Begin collecting email addresses pre-launch to build anticipation. Offer exclusive sneak peeks or early bird discounts to encourage sign-ups. This is comparable to distributing flyers before a grand opening, generating excitement and attracting potential customers.
Engage on Social Media: Use social media platforms to promote your launch, creating buzz and fostering a community around your brand. This is akin to announcing a special event through social media, reaching a broader audience.
Prepare Launch Day Promotions: Plan appealing launch day deals and discounts to encourage early purchases and create initial sales momentum. This is the digital equivalent of a grand opening sale, attracting customers and creating a sense of urgency.
Post-Launch Monitoring and Optimization
Monitor Site Performance: After launch, closely monitor website performance, tracking traffic, conversion rates, and bounce rates. This is like reviewing sales figures after opening a physical store, assessing initial success and pinpointing areas for improvement.
Gather Customer Feedback: Encourage customer reviews and feedback to identify areas for improvement and enhance the customer experience. This parallels asking for customer opinions in a physical store to gain insights and improve their shopping experience.
Continuously Optimize: CRO and marketing require ongoing attention. Regularly review and update your strategies to improve visibility and drive more traffic. This constant refinement is analogous to adjusting product displays and inventory in a physical store to maximize sales.
By following this launch checklist, you'll position your Shopify store for success, ensuring a seamless transition from design and development to a thriving online enterprise. This thorough preparation turns your vision into a vibrant online marketplace, ready to welcome its first customers.
Ready to accelerate your Shopify store's growth? ECORN offers expert Shopify design, development, and CRO services to help you achieve your e-commerce goals. From strategic consulting to innovative AI integrations, we empower businesses to thrive in the competitive online landscape. Schedule a call with ECORN today at https://cal.com/ecorn/new and discover how we can help you design a Shopify site that converts!


